New Application Technique
Simplified application process, flawless finish, applied like a pro
4ab39188-1af6-4813-8b0d-fcce5c0b66f2.tmb-1200x675.jpg?Culture=es&sfvrsn=b6c210f0_4 "Propspeed How To Apply Step by Step (7)")

INTRODUCING THE 4" PROPSPEED APPLICATION KIT
Experience a faster and easier application process with the new, All-In-One Propspeed Application Kit! The kit also introduces a new application technique launched as a part of our Like A Pro approach. The new application technique using the 4" Propspeed Rollers introduces a more efficient technique compared to traditional brushing methods, achieving a more consistent finish.
For instance, when applied to a 33-inch, 5-bladed propeller, this technique reduces the application time by 35%.
For large commercial propellers, the time savings are significantly larger due to the increased surface area covered. This not only enhances efficiency but also reduces labor costs.
El kit contiene:
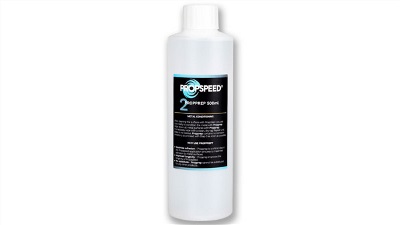
2 Propprep
Propprep es fundamental para la preparación química de la superficie metálica que se va a recubrir. Su bajo contenido de ácido fosfórico trata la superficie metálica para la aplicación de la imprimación anticorrosiva de Propspeed.
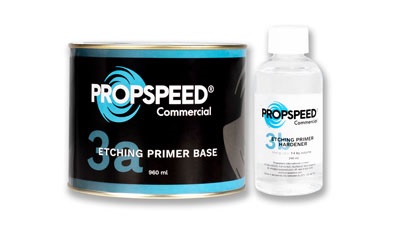
3a&b Etching Primer Base & Hardener
La combinación de la base y el catalizador para imprimación anticorrosiva de Propspeed es una de las mejores del mercado. Conocida por su firme adherencia y su gran resistencia a la corrosión.
4 Clear Coat
La resbaladiza capa final, no tóxica, que repele la colonización de organismos marinos y contribuye a reducir los gastos operativos de los propietarios de embarcaciones. More speed, less fuel.
PLANNING YOUR APPLICATION
The application of Propspeed requires planning. Make sure you have installed and taped over all zincs, all application gear is on hand, and you thoroughly understand the process – then you’re ready to get started.
Find Out How Much Propspeed You Need:
If your commercial vessel is under 100ft you can use the Propspeed Coverage Calculator™ app to estimate how much product you need to coat your underwater assets.
For larger jobs, we have a technically skilled and knowledgeable team ready to train, supervise, and support the integration and application of the Propspeed foul-release coating system. Please send an email to Clint Jones or get in touch with us using the button below.
The next thing to do is to make sure you have all the consumables and proper personal safety equipment you need to complete the application before you start.

CONSUMABLES AND PPE CHECK LIST:
- Monos desechables de pintor
- Guantes desechables
- Protección ocular
- Mascarilla antipolvo para lijar
- Dual action sander
- Wet and dry 80-grit sandpaper
- Plenty of clean cotton rags or microfiber towels
- Temperature & humidity sensors
- Propspeed Application Kit (PSAP4KIT)
- 2 x 4" Propspeed Rollers
- 1 x Roller Handle
- 2 x Paint Trays - Denatured alcohol
Find your local applicator
ENVIRONMENTAL CONDITIONS
You can’t control the weather, (if we could it would always be boating weather right?), but you can choose conditions that will ensure the best application outcome. Propspeed is best applied when temperatures are in the 16°C / 60°F – 32°C / 90°F range, humidity is below 85% and all application surfaces can remain dry for the duration of the application and curing process. Plan to do the application when conditions in your area are closest to these parameters.
Ambient temperatures influence the application of Propspeed and the set times of the metal Etching Primer and Clear Coat. We all know that there is a big difference between 60°–90°F, while it is not complicated, it is important to follow the correct re-coat window and drying time based on the environmental conditions you are operating in. Use the chart below to understand how environmental conditions influence the re-coat window and time your re-coats accordingly.

OVERVIEW OF THE APPLICATION PROCESS

Preparation
* Metal Preparation - Reapplication
a6da77b0-beaf-4017-a894-8e8ca05f670c.tmb-1200x675.jpg?Culture=es&sfvrsn=5e87a345_4 "Propspeed How To Apply Step by Step (1)")
If underwater metals are already coated with Propspeed, or if other coatings are applied, you will need to remove all other coatings before starting the new application. The easiest, fastest and recommended way to do this is with Stripspeed, a solvent-based paint stripper that has been specifically developed to remove foul-release coatings in less than 30 minutes. The thick consistency hangs on vertical and overhead surfaces and is easy to use. Just crack the bottle open to let some air in, shake well for 90 seconds until the consistency is thick and start using. Read the detailed application instructions on how to use Stripspeed here.
Application Tip
- As the last resort, old coatings can be removed using a dual-action or air-driven sander
- You must wear a dust sanding mask when removing old Propspeed - inhaling any residue could be harmful
* Metal Preparation - 80-grit Profile

Once you have successfully removed the previous coating, sand the metal to achieve an 80-grit profile to prepare the surface for a mechanical bond with the first coat of Etching Primer. This applies to all first-time Propspeed applications as well and can be done using a dual-action sander, or by hand using wet and dry 80-grit sandpaper.
With any surface coating, proper surface preparation is essential.
Application Tip
- High-pressure clean to remove marine foul from the surface, then allow sufficient time to dry
- Old coatings need to be removed completely before a fresh Propspeed coating can be applied
- Ensure the surface is thoroughly dry before sanding, and you can wet sand difficult areas
- Plan ahead and mix any settled solids at the bottom of the Etching Primer Base can. This usually takes no more than 2 or 3 minutes.
1 Initial Clean
c47fc3a6-f1fe-44af-b57e-f14822a72db2.tmb-1200x675.jpg?Culture=es&sfvrsn=408a36f4_4 "Propspeed How To Apply Step by Step (2)")
Application Tip
- All surfaces must be wiped down with denatured alcohol
- Ensure there is no residue remaining
2 Metal Conditioning
6e438008-4120-4603-a962-6aea167e0c81.tmb-1200x675.jpg?Culture=es&sfvrsn=714db43_4 "Propspeed How To Apply Step by Step (3)")
You are now ready to start painting.
Application Tip
- Use Propprep liberally
- All surfaces must be wiped down
Recubrimiento
Información importante
¡Debe estar preparado! Una vez que comience esta etapa del proceso de aplicación, tendrá que terminarla sin ninguna interrupción. Asegúrese de que el producto esté mezclado y listo para usar, y de tener a mano todas las herramientas necesarias. Es posible que tenga que trabajar por secciones y aplicar las capas de imprimación y de Clear Coat primero en una zona antes de poder pasar a la siguiente.
- Tiempo de secado del producto
- Entre 3 y 5 min a 27 ºC / 80 ºF
- Rango óptimo de temperaturas de aplicación
- 16 °C / 60 °F - 32 °C / 90 °F
- Tiempo de curado
- 8 horas a 27 ºC / 80 ºF
3a&b Etching Primer
14e718cf-dc85-4ffa-9abb-af72f4dbaa4a.tmb-1200x675.jpg?Culture=es&sfvrsn=5fe16faf_4 "Propspeed How To Apply Step by Step (6)")
Note: Failure to thoroughly mix the Etching Primer Base, as described above, may lead to premature hardening, inconsistencies and short life expectancy of the final coating system.
Once there are no solids left in the can, add the Etching Primer Hardener to the can and mix again. Any product not being used immediately can be re-sealed in the can and left in the shade for up to 6 hours.
Application Tip
- Use the Propspeed Application kit to save time and achieve a consistent finish
- Check weather conditions beforehand, ambient temperatures influence the application process
- Metals retain the temperature from the night before so consider surface temperature before applying
- Consider using a thermometer and surface laser temperature reader to make sure conditions are ideal
4 Clear Coat
Ensure the Clear Coat is well mixed and apply using the second Propspeed roller from the Propspeed Application kit (no foam rollers) or a brush as a secondary option. Apply a liberal coat to where it will not drip or “hang”. You have roughly 10 minutes to work with the Clear Coat before it starts to set on the surface you have applied to. If you feel you need to add more Clear Coat or spread areas out, do so within the fluid time of the coating before it skins over to dry. Once dry, do not add any more Clear Coat as it will not stick to itself.
Make sure there are no heavy runs or sags in the Clear Coat. You’ll have anywhere from 5 to 10 minutes to touch these up.
Make sure the surface is completely coated with Clear Coat. Any missed areas will appear dull in lustre. When you have finished coating the entire propeller with Clear Coat, give the propeller one more visual inspection just to make sure there are no areas that you might have missed and to check again that there are no runs or sags in the Clear Coat.
Any drips that harden on the edges of the propeller blades can be carefully cut off the following day with a razor blade.

Application Tip
- Do not use a foam roller
- Apply much like conventional varnish
- Touch-up runs or sags within 5 to 10 minutes
- Use the 4" Propspeed Application kit for best results
Recursos
Materiales descargables en un solo clic.
Aplicación
Documentación técnica
Documentación de seguridad